Bootstrap Button Upload
Intro
The button elements along with the urls wrapped inside them are perhaps one of the most crucial components allowing the users to have interaction with the website page and take various actions and move from one page to another. Most especially currently in the mobile first industry when a minimum of half of the webpages are being observed from small touch screen gadgets the large convenient rectangle zones on display screen simple to discover with your eyes and tap with your finger are even more necessary than ever. That's the reason why the updated Bootstrap 4 framework progressed providing more convenient experience dismissing the extra small button size and incorporating some more free space around the button's subtitles making them much more easy and legible to use. A small touch providing a lot to the friendlier looks of the brand-new Bootstrap Button Switch are at the same time just a little more rounded corners which together with the more free space around helping make the buttons much more pleasing for the eye.
The semantic classes of Bootstrap Button Switch
Here in this version that have the same variety of simple and awesome to use semantic styles providing the opportunity to relay definition to the buttons we use with simply just putting in a single class.
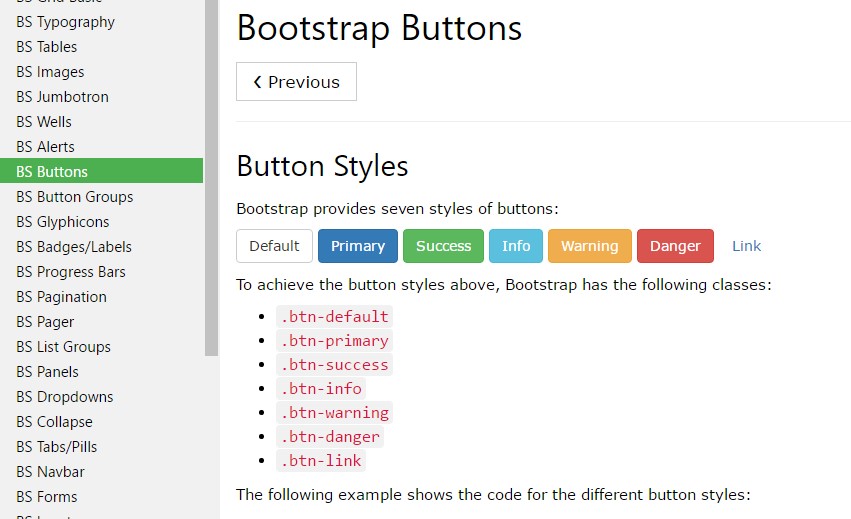
The semantic classes are the same in number as in the last version however, with several renovations-- the hardly ever used default Bootstrap Button basically having no meaning has been dismissed in order to get changed by the a lot more intuitive and subtle secondary button styling so right now the semantic classes are:
Primary
.btn-primaryInfo
.btn-infoSuccess
.btn-successWarning
.btn-warningDanger
.btn-dangerAnd Link
.btn-linkJust assure you first incorporate the main
.btn
<button type="button" class="btn btn-primary">Primary</button>

<button type="button" class="btn btn-secondary">Secondary</button>

<button type="button" class="btn btn-success">Success</button>

<button type="button" class="btn btn-info">Info</button>

<button type="button" class="btn btn-warning">Warning</button>

<button type="button" class="btn btn-danger">Danger</button>

<button type="button" class="btn btn-link">Link</button>
Tags of the buttons
The
.btn<button><a><input><a>role="button"
<a class="btn btn-primary" href="#" role="button">Link</a>
<button class="btn btn-primary" type="submit">Button</button>
<input class="btn btn-primary" type="button" value="Input">
<input class="btn btn-primary" type="submit" value="Submit">
<input class="btn btn-primary" type="reset" value="Reset">
These are however the one-half of the practical forms you can put in your buttons in Bootstrap 4 due to the fact that the updated version of the framework also provides us a brand-new subtle and interesting solution to design our buttons holding the semantic we just have-- the outline mechanism ( get more info).
The outline procedure
The pure background with no border gets removed and replaced by an outline using some message with the affiliated coloring. Refining the classes is definitely very easy-- simply just incorporate
outlineOutlined Main button comes to be
.btn-outline-primaryOutlined Additional -
.btn-outline-secondarySignificant thing to note here is there really is no such thing as outlined link button in such manner the outlined buttons are really six, not seven .
Replace the default modifier classes with the
.btn-outline-*
<button type="button" class="btn btn-outline-primary">Primary</button>
<button type="button" class="btn btn-outline-secondary">Secondary</button>
<button type="button" class="btn btn-outline-success">Success</button>
<button type="button" class="btn btn-outline-info">Info</button>
<button type="button" class="btn btn-outline-warning">Warning</button>
<button type="button" class="btn btn-outline-danger">Danger</button>
Extra text message
Nevertheless the semantic button classes and outlined visual appeals are absolutely outstanding it is very important to bear in mind a number of the page's viewers will not actually be able to observe them in this way if you do have some a little more important explanation you would like to bring in to your buttons-- ensure as well as the visual means you at the same time add in a few words pointing out this to the screen readers hiding them from the web page with the
. sr-onlyButtons proportions
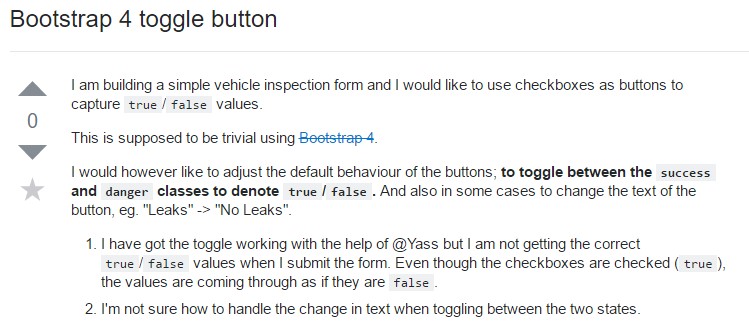
As we stated earlier the brand-new version of the framework aims for legibility and ease so when it refers to button sizings along with the default button proportions which needs no more class to be selected we also have the large
.btn-lg.btn-sm.btn-xs.btn-block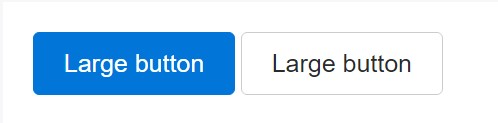
<button type="button" class="btn btn-primary btn-lg">Large button</button>
<button type="button" class="btn btn-secondary btn-lg">Large button</button>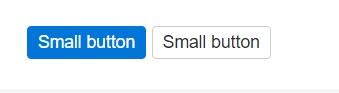
<button type="button" class="btn btn-primary btn-sm">Small button</button>
<button type="button" class="btn btn-secondary btn-sm">Small button</button>
Build block level buttons-- those that span the full width of a parent-- by adding
.btn-block
<button type="button" class="btn btn-primary btn-lg btn-block">Block level button</button>
<button type="button" class="btn btn-secondary btn-lg btn-block">Block level button</button>
Active mechanism
Buttons will appear pressed (with a darker background, darker border, and inset shadow) when active.
<a href="#" class="btn btn-primary btn-lg active" role="button" aria-pressed="true">Primary link</a>
<a href="#" class="btn btn-secondary btn-lg active" role="button" aria-pressed="true">Link</a>
Disabled mode
Force buttons seem out of action by putting in the
disabled<button>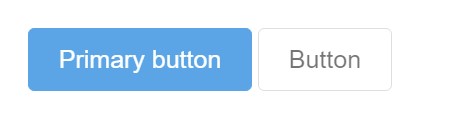
<button type="button" class="btn btn-lg btn-primary" disabled>Primary button</button>
<button type="button" class="btn btn-secondary btn-lg" disabled>Button</button>
Disabled buttons operating the
<a>-
<a>.disabled- Several future-friendly styles are included to turn off every one of pointer-events on anchor buttons. In web browsers which support that property, you will not find the disabled arrow anyway.
- Disabled buttons must incorporate the
aria-disabled="true"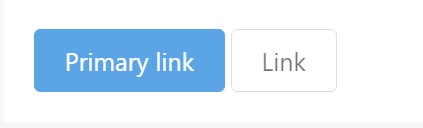
<a href="#" class="btn btn-primary btn-lg disabled" role="button" aria-disabled="true">Primary link</a>
<a href="#" class="btn btn-secondary btn-lg disabled" role="button" aria-disabled="true">Link</a>
Link features warning
The
.disabled<a>tabindex="-1"Toggle component

<button type="button" class="btn btn-primary" data-toggle="button" aria-pressed="false" autocomplete="off">
  Single toggle
</button>
A bit more buttons: checkbox plus radio
The reviewed state for these types of buttons is only improved with click event on the button. If you work with an additional approach to modify the input-- e.g., with
<input type="reset">.active<label>Note that pre-checked buttons demand you to manually include the
.active<label>
<div class="btn-group" data-toggle="buttons">
  <label class="btn btn-primary active">
    <input type="checkbox" checked autocomplete="off"> Checkbox 1 (pre-checked)
  </label>
  <label class="btn btn-primary">
    <input type="checkbox" autocomplete="off"> Checkbox 2
  </label>
  <label class="btn btn-primary">
    <input type="checkbox" autocomplete="off"> Checkbox 3
  </label>
</div>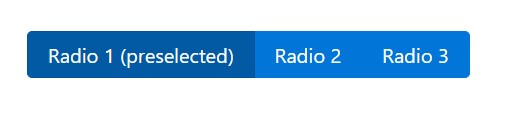
<div class="btn-group" data-toggle="buttons">
  <label class="btn btn-primary active">
    <input type="radio" name="options" id="option1" autocomplete="off" checked> Radio 1 (preselected)
  </label>
  <label class="btn btn-primary">
    <input type="radio" name="options" id="option2" autocomplete="off"> Radio 2
  </label>
  <label class="btn btn-primary">
    <input type="radio" name="options" id="option3" autocomplete="off"> Radio 3
  </label>
</div>
Solutions
$().button('toggle')Conclusions
Generally in the new version of the most popular mobile first framework the buttons evolved aiming to become more legible, more friendly and easy to use on smaller screen and much more powerful in expressive means with the brand new outlined appearance. Now all they need is to be placed in your next great page.
Check some on-line video guide relating to Bootstrap buttons
Connected topics:
Bootstrap buttons authoritative information
W3schools:Bootstrap buttons tutorial
Bootstrap Toggle button